Localization Using Select Locale
Step 1: App Messages
- From the Secondary Actions Menu, click the
I18Noption.
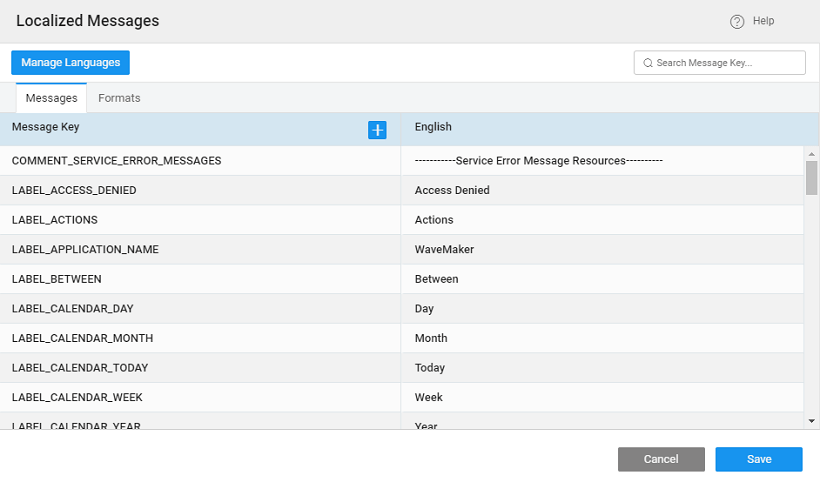
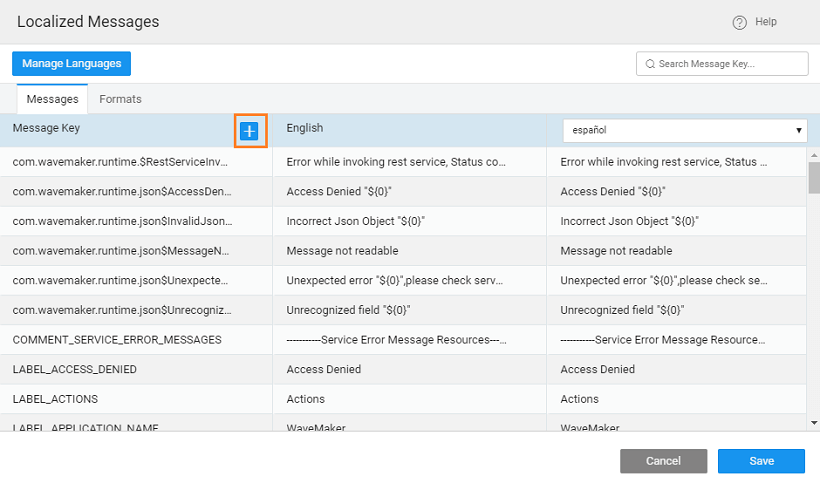
- Localized Messages dialog shows a list of localized text in the current application. The localized text appears as a dictionary of keys and values in different languages.
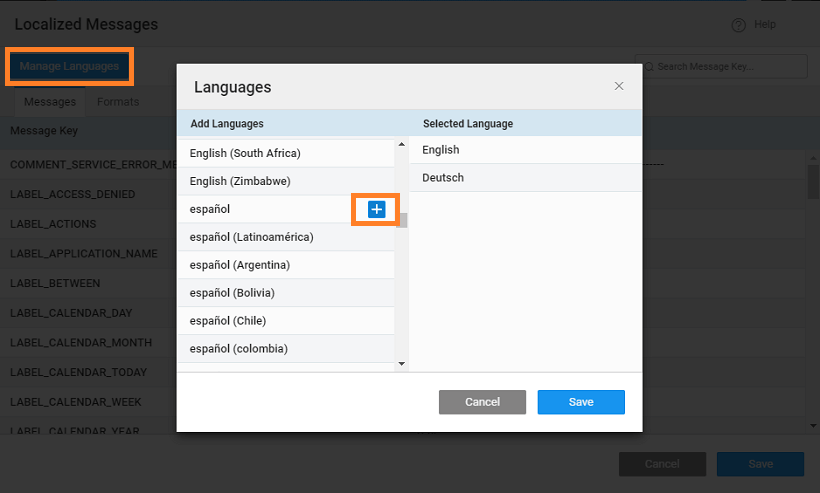
- To Add new language, go to
Manage Languages. It opens the Languages window. Select the desired language and click the Plus icon. Similarly, add any number of languages, and clickSave.
- To add localized messages, select the language and place the curser on the message to edit.
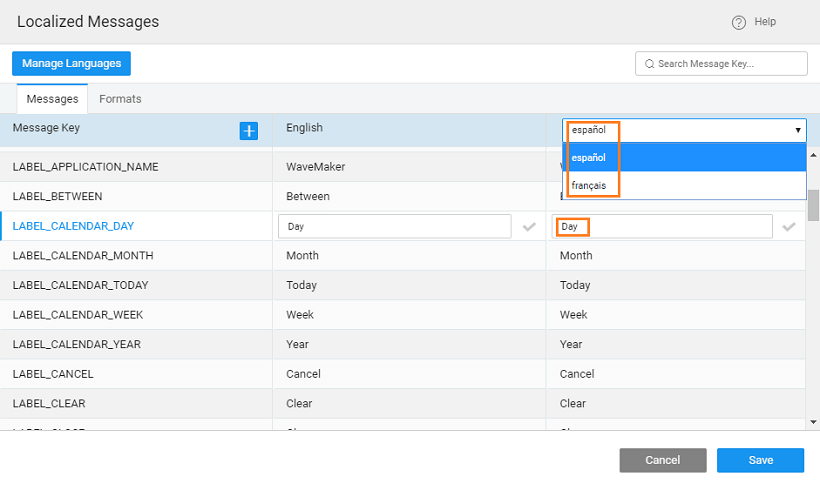
- To create a new localized text, click the Plus icon placed next to
Message Key.
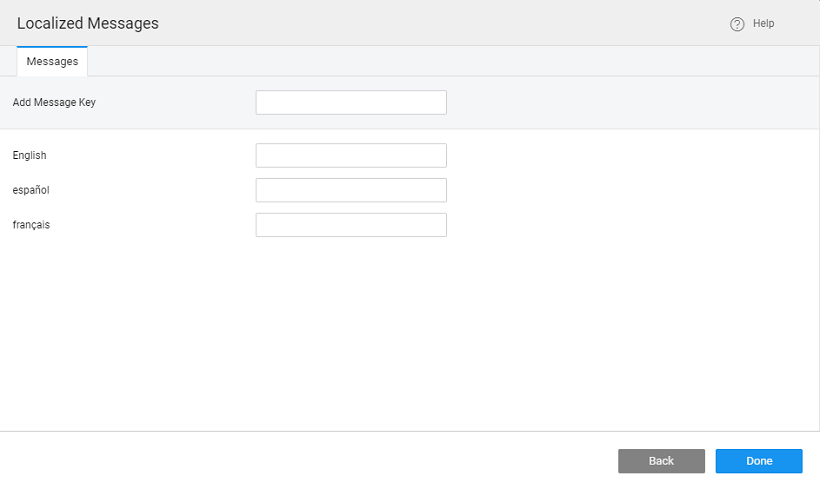
- Enter a
Message Keyand enter messages for all the Languages added and click Done to save.
- You can also set the date and time formats specific to a required locale. This will ensure that the date and time pickers are properly aligned and set to the preferred format.
tip
You can also select the currency symbol from anywhere in the app. This symbol applies to all the currency widgets across the app.
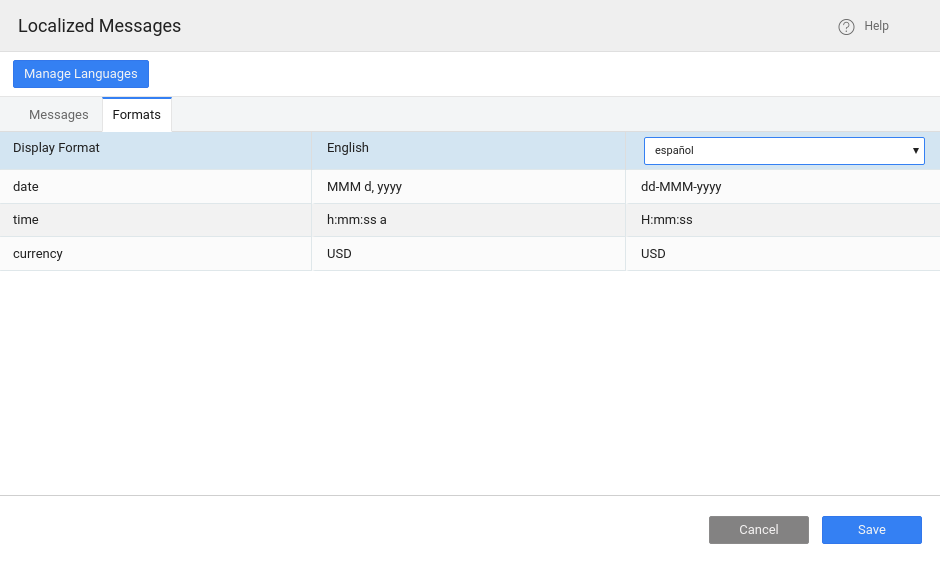
- Number format changes can also be implemented by using the Number widget. This will change the format based upon the selected or browser locale. For more information, see Numbers in Form Widget.
Step 2: Binding
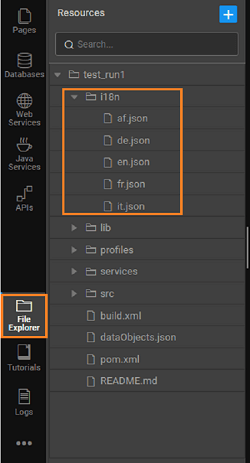
- WaveMaker creates a
.jsonfile for each of the locales. You can find the list of files when you selectLocalein the File Explorer section from the Developer Utilities menu. You can edit, save and delete files in the Code Editor.
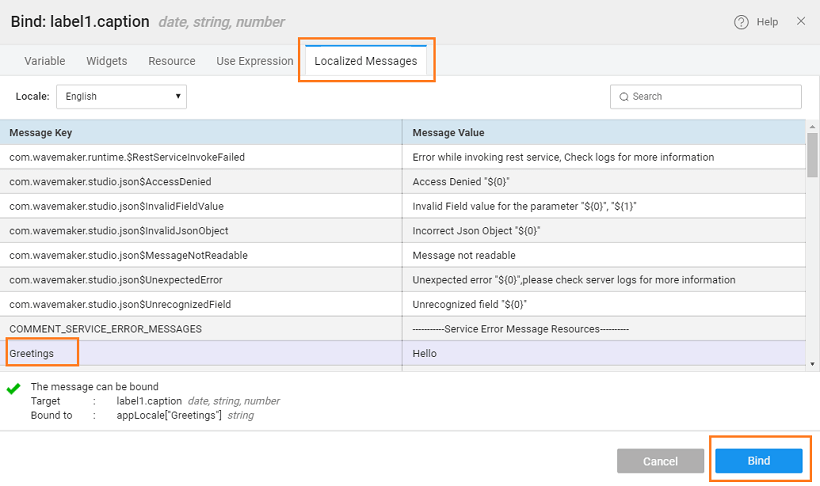
- To display messages, select the Label. Using the Properties Panel, you can bind the
Captionor any other relevant property to any of the application messages of the project. Once you have bound all the relevant widgets to the messages, you should enable the application to show the message based on the user's locale.
Step 3: Application
Let us see how we can add localization to our applications.
- Drag and drop a Select Locale widget on the project. This widget is bound by default to the
supportLocalevariable created when the locales were added in the previous step. Use a label bound to the Localized Message created in the previous step.
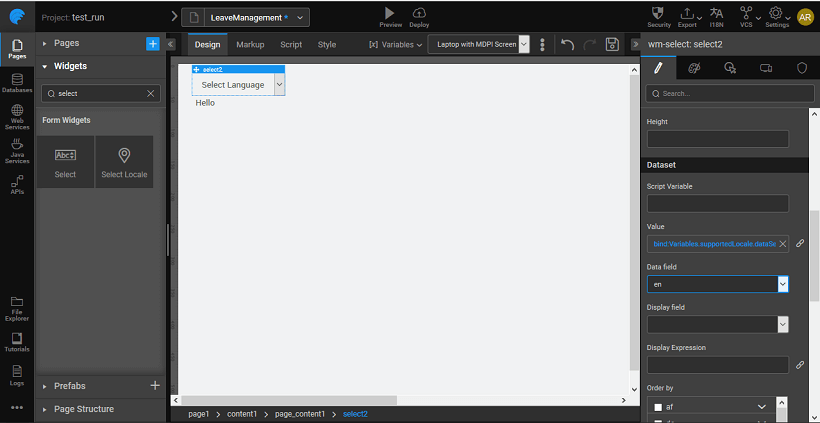
Save and run the application. From the Select widget, choose a language and see the text change in the Label widget.
When the user selects a Language on your application or when you set the default language of the app from the Project Settings dialog, WaveMaker applies the relevant locale settings to show the messages as per its value for that locale.